Showing posts with label Make up. Show all posts

Tuesday, 23 September 2014

NEW Video // My Everyday Make up for Autumn

Hey Everyone,

I hope you are all well! I have been super busy with settling back into Brighton and Uni life! But I have a new video for you all today! I have been using some new products as Autumn is creeping up to us :P! 


This has been my go-to-look for a couple of weeks now - I hope you like it! It's nice and simple, and I'm sure you can find alternatives if you don't have the exact products I use. 

I will hopefully get back to some sort of regular routine with my blog :) 

As always, I hope you are all having a lovely day! 
x

Thursday, 11 September 2014

NEW Video // 1# Empties!

Hey Everyone,

I have another video for you today! I have been keeping this bag of empty bottles and packaging so I could film my first empties video! Yay! 

Now, I love watching other people do these sorts of videos, so I wanted to get in on the fun! When I filmed this it appeared that something at leaked into the bag so the products were all nice and oily (lovely!) I still have no idea where it came from :/ 

Anyway...I hope you enjoy this video! 


I hope you've been enjoying my videos recently and I hope you have a lovely day!
x


Wednesday, 10 September 2014

Product testing on holiday!

Hey Everyone,

So, I am currently wrapped up in bed as I am not feeling 100% :( I am so anxious and worried at the moment, I have literally made myself ill! (which sucks!) But anyway, I know I was meant to post yesterday - but I really wasn't feeling up to writing anything. But as I sit here this morning, I thought - yes, today I shall write a post. 

So, here it is...

From the left: Nude Advanced Renewal Serum, Eve Lom Flawless Radiance Primer and Radiance Lift Foundation,  L'Occitane Radiance and Colour Care Shampoo and Conditioner, Eldora Lashes in H106, Nivea In-Shower refreshing after sun lotion.

When you are on holiday, it is both practical and fun to take sample sizes of products you may not have tried. It is a great opportunity to try something new; if you don't like it you can leave it there and never have to see it again! 

Here are few products I took with me on my recent trip to Italy (Click here to see) and my thoughts...

Nude Advanced Renewal Serum - I love Nude Skincare! Everything I have tried from the range I have loved. I have to say I think this one may be my favourite. This is a super light-weight serum and instantly absorbs into the skin. I loved using it before my La Roche Posay Effaclar Duo (+) as it helped it to sink in faster. There is also an instant cooling effect (which is great for a warm climate) and it kept my skin nice and hydrated.

Purchase full size? Definitely, when I get a job! :P

Eve Lom Flawless Radiance Primer and Radiance Lift Foundation - When I found out that the famous skincare brand - Eve Lom - was creating a make up line I got very excited. Now, I'll be honest, the primer I only used about twice (I forgot I'd packed it!). I didn't hate it and I didn't love it. It was a nice primer, don't get me wrong, but I don't think it's worth the price tag. 
The foundation on the other hand - was lovely! For my skin type, it wouldn't be appropriate for everyday wear as it can leave me looking quite shiny. But as a holiday luxe product, it was lovely and gave me that holiday glowing skin with some added coverage :P
 
Purchase full size? Not the primer, the foundation I would maybe consider a holiday treat :P

L'Occitane Radiance and Colour Care Shampoo and Conditioner - I'll start of by saying that these are the best sample sized haircare set I've ever used! Especially for us long haired gals! I was able to get my hands on them in a recent set, which was £10 with a purchase of £30 (See L'Occitane post here).  And the formula is lovely! I really enjoyed the smell of these, the shampoo lathered really nicely. They made my hair nice and shiny. Really enjoyed using them!

Purchase full size? Definitely!

Eldora Lashes in H106 - I recently mentioned these in my August Favourites Video. They made me fall back in love with false lashes. They are so light and soft (made from real hair); I forgot I was wearing them most of the time. This pair in particular are very wispy and long. They feel very flirty lashes, as they thickener out at the outer edge, which compliments winged linger perfectly! 

Purchase full size? Yes - absolutely!

Nivea In-Shower refreshing after sun lotion - I do apologise in advance; as I am about to end on a negative review. Sorry :( Now, it's not that I don't like the whole in-shower body moisturiser thing (I do - mentioned in recent favourites). It was the whole after sun aspect. When I come back from a day out in the sun, I have always enjoyed that instant cooling sensation when you apply after sun. It feels really calming to the skin and helps calm any redness/burns. I didn't get this feeling when I used it in the shower! It wasn't the experience I look for when using after sun. I think I'll stick to traditional after suns from now on.

Purchase again? Nope.

So, I hope you enjoyed my little mini review of some products. I really enjoyed trying them on my holiday! What were some of your holiday favourites?

I hope you enjoyed this post and have a lovely day!
x 

Sunday, 7 September 2014

Freshers Beauty Advice! // Night Outs!

Hey Everyone,

So, this year I am fortunate enough to be re-living my freshers experience; as I am helping out with the Welcome Team at the University of Sussex! (If you are heading to Sussex this year, please come and say hello!) 

This post is going to be focused on Night's Out make up - it is basically quick and simple make up that can be done in 10-15 minutes. So, even if you are not a fresher; this will be good for quick make up for anyone! 

I wanted to do this post as I vividly remember having little to no time to do my make up during Freshers Week! Why? Because you are busy doing all the activities in the day such as exploring the campus/town, or freshers events planned by the uni, or induction classes for your course etc. And it is so important that you eat before a night on the town. This meant that there was no time to sort my face out. So, a quick look will mean you can spend more time socialising with your new friends/housemates and having fun! 

So, here is a guide to quick make up looks for Nights Out during your busy Freshers week.


1. If you have wonderful skin then I wouldn't bother with this first step. However, if you are like us mortals then a good coverage Foundation is essential. I would say a full to medium coverage foundation is best; which then means you can skip concealer. I love my MAC Studio Fix Fluid Foundation as it is pretty full coverage and looks good in photos (particularly flash photography!)

2. Simple eye make up is key to making this look quick. I would stick to a stick or cream eyeshadow as it is one step and can instantly transform your look from day to night. I have three to recommend the Kiko Long Lasting Stick Eyeshadow in 06, Rimmel Scandaleyes Shadow Paint in Rich Russet, and (a more luxury product) Surratt Smokey Eye Baton in Cendres (Click here to see review). If you do struggle with creasing then a little eyeshadow to lock in the colour wouldn't go amiss - just use a fluffy blending brush to blend the edges (MAC 217 for example).

3. A good black liner is a must for University; what ever formula works best for you! (Eye Kohl: MAC Feline Pencil, Gel: Inglot AMC Gel Eyeliner (77), Pen: Stila Stay all-day liquid liner in intense black) Good for last minute cat faces and winged liner, (if you are like me and can’t live without!). Though I always like to have a cheap one (Barry M Black Kohl Pencil) that I’m okay sharing with my friends! 

If you want to change you look up a bit for the night then why not try a coloured eyeliner. I've been loving my Inglot AMC Gel Eyeliner in (75) which is lovely deep purple (Click here for swatch - at 1:25). Or if you are feeling really glam, you could try a glitter eyeliner! The Urban Decay Heavy Metal liners are the best by far!

4. If you know the night is gonna be a long one then a neutral pink lipstick or lipgloss is probably the safest thing to put on your lips. It's safe as when it rubs off it won't leave any weird patches and it won't transfer to other people (if you get my drift ;) ) Some of my favourites are the Clarins Instant light perfectors and the Charlotte Tilbury K.I.S.S.I.N.G. Nude Kate Lipstick (Click here for review). For a cheaper alternative the Soap and Glory Sexy Mother Pucker Gloss Sticks are lovely!

5. You need a black volumizing mascara - I've been loving my Maybelline the Falsies! If you know you get panda eyes from your mascara, I would suggest a water proof formula (L'Oreal Volume Million Express Waterproof) on the bottom lash line!

6. Then finishing touches - Powder products! Don't forget a good blush to bring some colour into your face. Now is the time for a quick contour and highlight. I didn't include this in my picture; as I don't actually own this but I would recommend a palette of some description. The most affordable one is the Sleek Face From Palette; as it has all three! 

Don't forget to powder! I like the MAC Mineralize Skinfinish Natural  as it gives a bit of extra coverage without being cakey!

Optional items: Lashes and Glitter! If you have some extra time then these two options are a fun way of dressing up for a night! When ever I wear the MAC 3D Glitter, I always get compliments and it is a great conversation starter! I know lashes can be expensive, but as long as you take them off carefully and clean them, they can last a good few wears. The ones I have been loving are the Eldora real hair lashes; as they are super comfy and look awesome! (Featured in August favourites).

I hope you have enjoyed this post, I'd love to know what your go to Night Out products are - leave them in the comments below! 

As always, I hope you have a lovely day!
x

Friday, 5 September 2014

Favourites Time! // August 2014

Hey Everyone,

I hope you all had an amazing August! I can't believe this month has gone sooooo quickly! I've had a month of ups and downs, but overall it's been pretty good!

Last months favourite was a huge one! (Click here if you haven't seen it) and this month I haven't really been using anything new! When I finally went through the products I decided I would make a video :) Would be a shame not to! ;)


I hope you enjoyed this post and have a lovely day!
x


Sunday, 31 August 2014

NEW Video // Make up Packing

Hey Everyone,

I hope you are all well. I am back, safely from my holiday in Italy - I had an amazing time! I would 100% recommend going to Sorrento if you have never been. 

Even if you just go for view!

Now, there were some technical difficulties when it came to editing this video before I left last Friday. It involved a lot of crying and wanting to throw my laptop out of the window (we've all been there!) But, the issue has been resolved and it is here! I hope you enjoy it! 

How I pack my make up for my holiday!


I hope you enjoyed this post and have a lovely day!
x

Friday, 29 August 2014

Show your brushes some love!

Hey Everyone,

I know you are all aware that I am away on holiday at the moment (this is a pre-scheduled post) and I am showing my brushes some love this evening. As I am going away for a week,  I thought I would give the ones I'm taking some love! This post also gives me an opportunity to show you some new products I've been using to clean my brushes.

First step - Deep cleanse


Now - I'll admit - this is my first proper Brush Soap/Shampoo I have EVER used! I know! It is shocking, I only used normal hand soap! :O!

But I wanted to change that! So, when I went to IMATS (Haul Video) I found this little beauty. I bought it from the Love Make up counter; as it wasn't too expensive. Another thing that draw me to it, was the smell. As the picture on the front suggests, it smells like lavender :P! Which makes cleaning my brushes a much more pleasant experience. Also, it is made with Goats Milk, which led me to assume it would make my brushes uber soft (which it does!)

How to use: Dampen the brush and the soap. Then, swirl the brush in the soap and then rinse! It is that easy :D! (I'm sounding like an advert now!)

Second step - Towel dry


I know a bit obvious - but I wanted an excuse to do a cool aerial shot :P!

Remember to be gentle and to re-shape once excess water has been removed.

Third step - Dry UPSIDE-DOWN!


Now - this little item has made drying my brushes less of a fuss.

What is it you may ask? It is a brush tree. To be more precise it is a Benjabelle Brush Tree. Again, I got this from IMATS from Love Make up.

I love this thing - for several reasons. Firstly, it drys brushes quicker! See the big brush in the picture (in the middle) that is a Louise Young Super Foundation Brush. This brush used to take a day and a half to dry! It seemed to take ages, and this is one of my favourite brushes! Now it only takes about 10 hours - amazing! Secondly, it looks a lot neater on my table top and it seems to take up less space than you'd think.

I would highly recommend these brush trees; as they are good quality and really get the job done! 

I hope this posts inspires you to clean your brushes (yes - I'm looking at you!). As always, have a lovely day!
x

Thursday, 21 August 2014

Make up Organisation // New storage items

Hey Everyone,

So, I don't think I have ever met a beauty enthusiast/vlogger/blogger not get excited by the prospect of NEW storage items! It is a serious subject, and needs to be just right - in terms of presentation and usefulness. 

I am currently living at home for the summer, so my storage system is not ideal; as my collection has grown substantially since I was in Sixth form. So, while in HomeBase and BHS, I found two new items which have helped me organise my stash. They were both inexpensive and have other potential uses.


My first item is this Chrome wire Cutlery Tray - which I picked up from HomeBase for about £3. I have seen this technique of organisation used many times in the blogger world. Why? Because it just works! Instead of my previous technique of throwing them all in - this works much better. I am able to separate the lipsticks form the lip glosses, and the mascaras from the eyeliners. 

As I said this is my old storage unit from when I was still permanently living at home. So, this draw is too small for my collection, but this tray is still useful (I have even been able to colour organise my lipsticks and lip glosses!) 100% recommend something like this to organise inside draws.

BHS Vintage Tooth brush holder (sorry - no link was available)

Now this was a steal! I managed to find this for £2.99 (originally £6.99), and I just love the fact it says "Brush" (even if it really means tooth brush). It is the perfect size for smaller brushes, such as eye and lip brushes etc. 


As you can see from this set up on the top of my cabinet, I like to keep my brushes in mugs. More specifically, Starbucks mugs which I have been collecting since I went to a Starbuck's in the Bahamas when I was about 12! My most recent addition to my collection is my Amsterdam mug - the bike just makes it :P 

To me this is the most effective method of storage for brushes; as they are easily accessible and they are kept (relatively) clean. Logically, my larger brushes are in the larger mug. At the start of the summer, I had all my brushes in the SAME mug - which meant that I kept losing smaller ones (namely eyeliner).

I am now happier with the addition of my new storage. I'd love to know how you store your make up - let me know in the comments below.

I hope you enjoyed reading this post and have a lovely day!
x

Friday, 15 August 2014

Review Beauty Blender // Worth the hype?

Hey Everyone,

So, this has been on my radar for a long time. This is a much loved beauty applicator by beauty bloggers everywhere and is continuously hyped up. My interest was increased after a number of new posts on it, after it was included in a recent Birch Box. Unfortunately, I am not subscribed to this service - yet ;)! So, I made it my business to find the cheapest seller :P! 


It is still expensive for a make up sponge at £14.95 - though it can be as expensive as £16! This is pretty pricey - the question is..is it worth it?

 From the the left beautyblender dry and damp

So, you probably all know the drill by now with this sponge. It is a lovely hot pink sponge, shaped like an egg. The rounder side is for blending on larger areas of the face (such as cheeks, forehead etc.) and the pointy end is for getting in all those nooks and crannies (such as around the nose and under the eyes etc.)

From the left beautyblender, MAC Pro Longwear Foundation in NC15 and Real Techniques Buffing brush

 For this little test, I decided to use one pumps worth of foundation for each side of the face. On the left side I used the beautyblender, and on the right I used my usual brush (RT Buffing brush).


For the left side, the best way to apply the product is to dot it onto the face and then go in with the beautyblender. You use the damp beautyblender in a "bouncing" motion to blend out the foundation. The one thing I will say about application is you do need good lighting when applying; so you don't miss out any lines that need to be blended.

Only right side of photo (left side of face) foundation with beautyblender

As you can see, it gives a gorgeous airbrush look to the skin. This is a medium, build-able coverage foundation; this applicator works best with slightly thicker consistency products. I have used no concealer at this point - so you can still see a couple of my active breakouts showing through (which I would normally cover with concealer). 

On the left beautyblender used. On the right Buffing brush used.

Please excuse my awful skin at the moment (hormonal breakouts suck!). I know this isn't probably the best representation of the applicators; as my skin is pretty bad on the one side. However, there doesn't really seem to be much difference between the two - except the beautyblender may have reduced the appearance of redness (ever-so-slightly more!) 

Both sides foundation.

I don't know if it's just me that sees this - but it appears that my skin on the beautyblender side (right side of the photo) appears less flat. I feels like it gives a more skin like appearance, even when using a medium to full coverage foundation. 

I definitely like the beautyblender, but my only two cons are that it is a bit of a effort. You have to dampen the sponge and tissue it off. Also, this type of blending technique takes slightly longer than your normal buffing brush. Furthermore, I feel you use more product this way than with a brush.

I will continue to use this sponge, and use it when I have a bit more time in the morning to get ready. However, will I repurchase this? Probably - if it slightly cheaper (maybe I'll stock up when I'm next in the US) 

What are your thoughts on the beautyblender?

I hope you enjoyed this post and have a lovely day!
x

Wednesday, 13 August 2014

First glance at Charlotte Tilbury // K.I.S.S.I.N.G. Fallen From the Lipstick Tree

Hey Everyone,

I finally caved! I resisted the first time I saw the new glorious, glistening counter in Selfridges - that is home to a new-ish brand of Charlotte Tilbury's. It just had to be done - eventually. I had some time to kill after my work experience in Birmingham, and the swatches got to me...and then I tried it! There is no going back after that point!

I'll start with my only negative comment of the post. I have spoken to Charlotte Tilbury assistants before and they have always been lovely and polite. Except for the one that served me on this occasion. He seemed extremely disinterested in my request to try the lipsticks - as if it was an inconvenience to him; as it interrupted his conversion with a co-worker.  He was very cold, and didn't seem to want to help me make a decision on what shade to go with. I was overall unimpressed - and it is a shame; as I shall now think twice about shopping at the Birmingham counter.


First of all, can we just admire this packaging? 


There is no detail spared - even on the box! 


This is what the lipstick case looks like, it has the signature rose-gold packaging. I love the CT logo on the top; lovely touch :P! I feel very fancy when I pull out this lipstick: it feels and looks good quality.


It is a light nudey-pink shade - definitely more on the nude side than pink. It is sheerer than some of the other shades I tried, which means it is pretty much fool proof. I was able to put this on on the train with no mirror, and as far as I'm aware I didn't look a mess afterwards! Also, on a side note, love the name - makes me feel extra trendy!  

 This is it on my lips (natural light).

This is now my favourite nude - it is much more wearable than my Tom Ford lipstick in Blush nude, which is much more opaque. The formula is extremely comfortable to wear; it is made from special plant extracts that not only make it a joy to apply, but also protect the lip.

Whole face shot.

As you can see this works really well with my skin tone and I don't feel like it washes me out. Lovely finish - with enough colour pay-off without it being over powering!

So, if you haven't had chance to try these lipsticks out - I'd definitely recommend trying these. I will certainly be looking to add more Charlotte Tilbury to my collection. 
I hope you enjoyed this post and have a lovely day!
x

Monday, 4 August 2014

Favourites Time! // July 2014

Hey Everyone,

I hope you all had fantastic months in July - I know I did! I have a mammoth of a favourites video for you, and I am using my new camera (everyone shouts "Hooray!"). It actually came out pretty well, it definitely feels more professional - except my camera stand of books!

Stick with me on this one and you may find some gems in there too!


I hope you enjoyed the video and have a lovely day!
x

Tuesday, 22 July 2014

#7 What's on my nails?

Hey Everyone,

I hope all is well. So, I have finally broken away from my beloved Formula X nail polish (which is still amazing!) To try a new nail polish, which my lovely sister got for me from South Africa - who knew they had Inglot in SA! 


Firstly, this colour is beautiful! I am super into the colour purple at the moment (purple hair, purple nails, purple lipstick etc.) I actually didn't have a proper purple nail polish in my collection before this one :O! I love that this one is a slightly metallic purple and has a slight pink undertone, which brightens the colour slightly.

It terms of application - it wasn't terrible, but it wasn't a breeze. You definitely need two coats with this one. 

Longevity: I can't say too much on that as I've only had it on for like a day, but it has survived one day in the office with no chipping :)! So, I shall have to let you know how it goes! (it has large shoes to fill, in the place of the Formula X!)

I hope you are enjoying the warm weather and have enjoyed this post!
x

Tuesday, 15 July 2014

Inglot Freedom Palette // A Review

Hey Everyone,

If you didn't already know, I went to IMATS this year! (This is like my fifth time mentioning it - feeling a bit like a parrot!) So, of course, I had to hit up the Inglot stand which had up to 50% off! Amazeballs! 

I have tried Inglot products in the past, mainly lipgloss and cream foundation. Although, I had never tried their eyeshadows, which have been compared to the likes of Urban decay and MAC eyeshadows. So, they must be good! 


 From the left: 353, 344, 342, 405, 452


Here are the swatches.

So, I think the first thing to say is that these shadows are so soft and buttery. They are highly pigmented and last incredibly well. I think 405 (the bronzy-orange shade) is my favourite, as it is beautifully metallic and has gorgeous colour pay off.

I've been wearing the first three shadows as an everyday neutral combo and they have lasted so well, with minimal creasing. Overall, I've been pretty happy with them!

I think the only downside to this freedom palette is that once the shadows are in the palette it is incredibly difficult to remove them! You have to use a sharp knife or some small nail scissors. But apart from that I am pleased :D!

They are normally £4.50 each, which I think is a steal for the quality of the product! Then the palette is £7.00. Therefore, it is fair to say I shall be definitely getting some more of these.

I hope you enjoyed this post and have a lovely day!
x

Saturday, 12 July 2014

NEW Video // IMATS haul 2014

Hey Everyone,

If you haven't already seen from my various social media outlets, I went to IMATS in London this year! I had the most amazing time - I was like a kid in a sweet shop! I went with my baby sister, Amy, and my good friend, Allie (Living life in docs). 

I bullied my sister into joining me in the haul video. I had such fun making this video, and I hope you enjoy it!

WARNING! Makeup overload! WARNING! 


I also vlogged the whole day - this was my first vlog on my Youtube channel. So, if you didn't get chance to go to IMATS this year, this is what happened...


I hope you enjoyed this post and are having a lovely day!
x

Friday, 4 July 2014

#6 What is on my nails?

Hey Everyone,

I hope all is well! Well if you couldn't tell from my Instagram I am in PARIS! :D I'm having an amazing time and the weather has been great!

So, of course - I went to sephora! :D and picked up one of the Formula X polishes in Extraordinary. So, I had to tell you my first impressions.


First off it's so opaque - literally one coat would have been good enough! It was super easy to apply and the colour is beautiful! :P 

So, I may have to pick one more colour before I go! ;)
I hope you enjoyed this post and have had a lovely day!
X

Saturday, 28 June 2014

The wait is over! // Benefit's they're real push-up liner

Hey Everyone,

Today was a very exciting day for me :P As you tell from the title, today was the official global launch of Benefit's they're real push-up liner! *squeals with excitement* And as you all know, I love me some black liner to draw my flick. So, with all the hype surrounding this product I had to give this a go. 


Here is me getting arrested in John Lewis - even had the handcuffs! A little shout out to the lovely Fran for doing my beautiful liner and letting me have a play! (And I look forward to seeing you for my make over! :P)

I was lucky enough to have a pre-launch look at this product last week when I was shopping in Birmingham, just to have a play. It was love at first swipe :P

The box it comes in is very much like the they're real mascara; as of course this is a new member of the there're real family :) (there is also the they're real remover).

There are some interesting stats on the front and on the back it talks about the AccuFlex tip - which was 5 years in the making apparently :P

Here is the pen itself! I have to say I love this packaging - I love that they made the sides of the pen flat which makes it comfortable to hold.

It also feels good quality - I mean this isn't a cheap purchase at £18.50, but it definitely feels expensive.
And here is the special tip everyone is talking about. It comes with a plastic stopper, which I've chose to keep as I've read reviews that say the product can dry out! And also it stops it leaking in your make up bag.

To dispence product, you have to twist the bottom of the pen until it has clicked twice (this appears to be enough product for one eye). Though, in my first usage I would recommend wiping some product on the back of your hands so it is a smoother application.


There is the final look. I'm actually pretty pleased with out this turned out! As this product will take some time getting used to, but I was just so impressed our black it is! Cause this not just a liquid liner it is a gel formula - which is wonderfully matte!


On the left, I draw a thinner line (which is more my everyday liner) and then on the right is a thicker line. It was fairly easy to do both. I'd heard people say it was difficult to get a thinner line - I disagree but then again some people may consider mine thick. It is all personal preference.
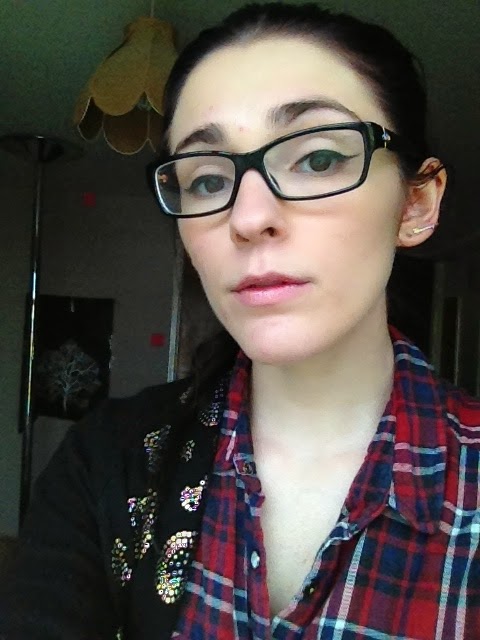
One last shot of my face, I promise. This is what it looks like with my glasses :)

I'd say my first impressions were it is a lovely liner - a highly innovative product. The pen really does hug the lashes and produces a lovely crisp line!

Is it for beginners? Probably not - I'd say practice with an angled brush and black shadow as it is very similar.

It will be very handy for travel for sure! I will continue using it and have to give you an updated review in a months time! But I would definitely suggest giving it a go in the shop :)


I hope you enjoyed this post and are having a lovely day!
x

Wednesday, 25 June 2014

#5 What's on my nails?

Hey Everyone,

I haven't done one of these in a while, and I'm really pleased with my nail combo this week :)


The main colour is Mint Green from Barry M - not going to lie this isn't my favourite mint green colour out there, but it is the only one I have (and when you gotta wear mint nails, you gotta wear mint nails!)


I don't normally do an "accent" nail, but I picked this gem up in Selfridges yesterday and had to wear it!
It is by a brand called Azature in the shade Blue. This picture doesn't do it justice - it is stunning! (Could be my nail colour for IMATS? And yes I am planning my nail polish!)

I've heard and read about the brand numerous times on the blogsphere. These nail polishes are made with a real black diamond! So, normally very pricey! However, the Selfridges summer sale is amazing, and I picked this bad boy up for £2! :O
So, if you are near a Selfridges any time soon definitely check this out :P

The shade is inspired by the blue diamonds's intensely hued shade, which symbolises balance and inner strength.

Are any of you going to IMATS this year?
I hope you enjoyed this post and are having a lovely day!
x

Monday, 23 June 2014

It's love...// Surratt Beauty

Hey Everyone,

So, instead of continuing with my Blog Challenge (which has been massively failing), I decided to do a different post today. It's all about Surratt Beauty, which is the love-child of the fabulous Troy Surratt. It is a Japanese-inspired makeup line that was four years in the making. 

This range is exclusively to Liberty London - which is home to one of my favourite beauty halls! Definitely, the first thing I noticed about the collection is that it looked pretty small. However, it has blushers, lipsticks, lip glosses, mascara, eyeliner, brows - you name it! There is certainly enough there to get your attention. Also, wanted to mention that Liberty has a loyalty card! Hurray! This includes Beauty Loyalty, which awards you an extra point for every £1 you spend on beauty. Doesn't sound too bad. 


I also wanted to mention the very special service I received from the sales assistant, Narong, who was extremely knowledgable of all the products. I asked him, "What would be the must have product from this makeup line?" Without hesitation, he said the, "the smoky eye baton". 

It is packaged in a sleek black box, which has the the brand name lightly embossed on the bottom.
You probably can't tell from this picture that there is a gradient change in finish on the pencil itself! At the pencil end it has a matte outer casing and as it goes to the shadow-end it goes glittery! Amazing - I love those little details, which makes the product even more special!

Also, look how small it is! It makes this product perfect for travel or just having in your handbag for touch ups!


To show me how this product worked, Narong draw this basic eye-shape on his hand. This little illustration shows how easily this product can create a classic smoky eye.

I went for the taupe shade called Cendres; as I felt that I could use this as an everyday shadow as well as use it in the evenings paired with a bold lip.


To start, you have to line the top and bottom lash lines with the creamy eye liner. On the top lash line, I have been going about half-way up my eyelid as I wear relatively strong eyeliner.


Then, all you have to do is apply the satin eyeshadow - I do this straight from the applicator which is pretty easy. To finish, I just blend the top line with a MAC 217.

There appears to be minimal fall-out and the colour is extremely beautiful and opaque! I am in love with the subtle sheen this product gives to the eye.


This is what it looks like when first applied.

This is after a long day at work (so sat in a stuffy, sweaty office for 6 hours!) and after looking after 9 kids at Rainbows! So, not bad wear. There is a bit of creasing, but that is to be expected.

Overall, I am pretty impressed with this product. I have used it everyday since I purchased it! To say I'm obsessed is an understatement! Just need to get more colours, and there are five shades in total.


Other products I am lusting after from Surratt beauty include Artistique blush in 5 duchesse (created for Adele! Which not going to lie, makes me want it more!), Lipslique in Hevyn (created in memory of the great Kevyn Aucoin) and Expressioniste brow pomade.

Are there any products that have caught your eye?

I hope you enjoyed this post and are having a lovely day!
x

Saturday, 21 June 2014

NEW Video // Wavy hair and Purple makeup tutorial

Hey Everyone,

I hope you are all well! I know my scheduling has been all over the place! :/ I swear I take on too much - so unfortunately my blogging and videos have to be put on the back-burner atm! :( 

On a side note, Cheekysmiles101 is also going through some serious re-styling plans which I am soooo excited about! So look out for the new changes - they are going to be awesome! 


So, here is my new video! :D I hope you enjoy it and have fun playing with colour!

I hope you enjoyed this post and are having a lovely day!
x


Sunday, 1 June 2014

Red Lip Tutorial!

Hey Everyone,

My new video is up and it is all about the red lip! I've never owned a orange-based red before Lady Danger from MAC. I absolutely love it - definitely gonna be wearing this look a lot over the summer! 

What are your favourite reds? 

I hope you enjoy this video and are having a lovely day!
x

Related Posts Plugin for WordPress, Blogger...